Swift Journal: Hello, World in iOS 8
Now that the Xcode 6 beta is publicly available, I decided to dip my toe into some coding. I expect to make a lot of rookie errors and gladly accept constructive comments and suggestions for improvement.
I hope this post is extremely accessible to other noobs, because it’s not written from the perspective of an expert who has forgotten what it was like to know nothing!
Hello, Swift!
Every beginner programmer’s first task is to write a Hello, World program. It’s an introduction to the syntax of a new language in which you write code to generate a console or popup message with a string of text, typically “Hello, World!”
In most languages this can be done with just a few lines of code.
In this entry I’m going to document creating a simple Hello, World iPhone app with a minor twist: The user types their name into a text field and the Hello message is customized to say “Hello, NAME!”
If I just wanted to output “Hello, World!” to the console, it would be this simple in Swift:
println("Hello, world")
But, that wouldn’t display anything on an iPhone screen, it’d just be a console message. So I wanted to include a basic interface. Thankfully this is easy in Xcode. Here are the steps:
1. Create a single view application project in Xcode

Fill in the name and identifier fields, and be sure to choose Swift and iPhone for language and device.
2. Create your interface in Main.storyboard
Building a UI in Xcode is really easy. In the file Main.storyboard, it will show you the “Interface Builder” GUI for adding elements. These will be dumb placeholders but later we’ll connect them to the code of the app.
Before I added any elements to my interface, I set my UI to be portrait and 4-inch iPhone. (Apple has been laying the groundwork for arbitrarily sized interfaces for awhile now. Many expect more iPhone screen sizes to come).
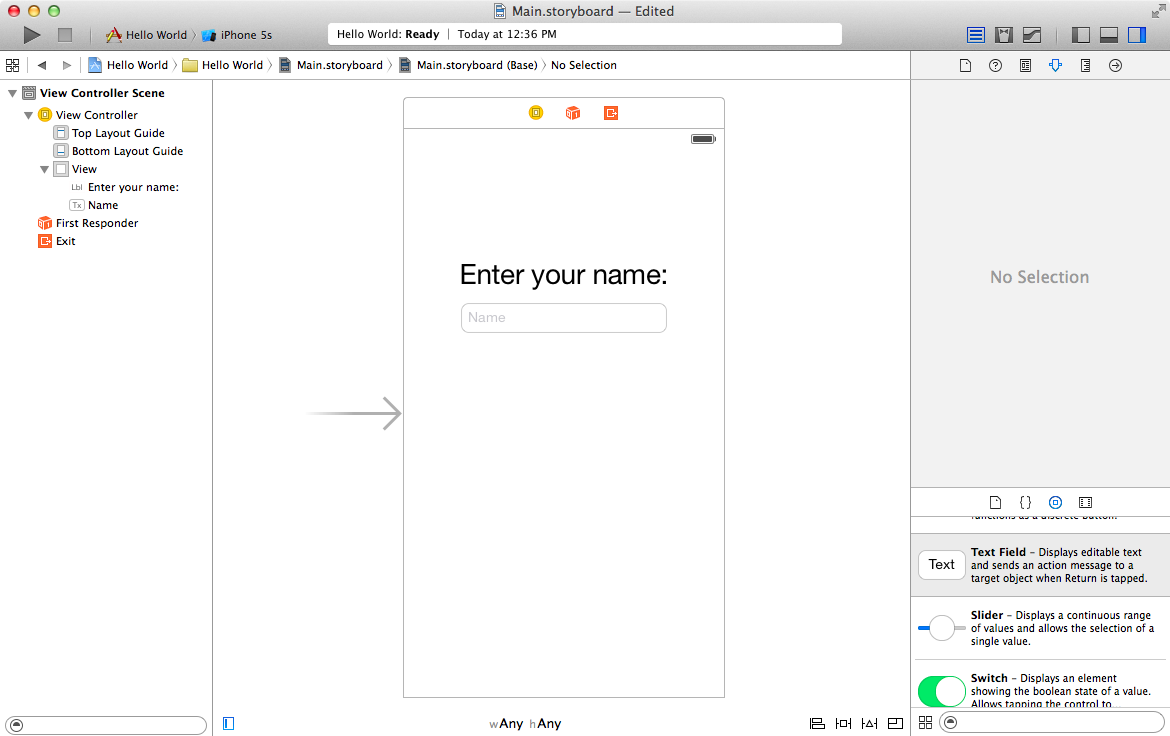
I dragged in a Label, centered it, and typed “Enter your name:”. Then I dragged in a Text Field and set the placeholder text to “Name”.
3. Connect your UI to your code
Our interface looks nice, but it doesn’t do anything yet. Let’s connect it to the code of our app. Using the Tuxedo view in Xcode you can see code alongside the interface builder. We want to see the file ViewController.swift alongside our Main.storyboard UI.
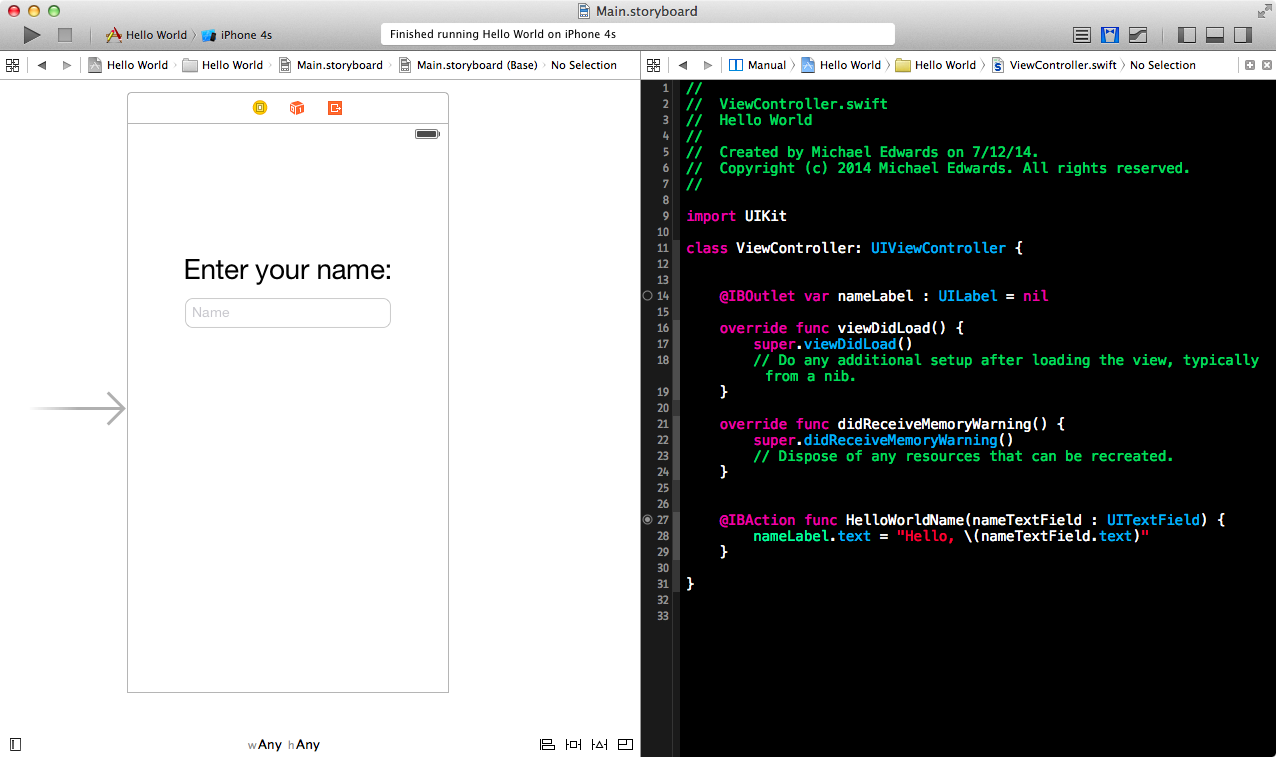
In the above screenshot there are two new pieces of code that weren’t there originally. Here’s how I added them.
If you ctrl-click and drag our Label (“Enter your name:”) over into the code view, Xcode will generate a variable for this element. It’ll pop up and ask you to name this variable, which I’ve called nameLabel.

The code it will generate is the following:
@IBOutlet strong var nameLabel : UILabel
The storage does not have to be strong, but we want to add a = nil after it, which looks like this:
@IBOutlet strong var nameLabel : UILabel = nil
What is @IBOutlet?
Being a complete n00b, I had no idea what @IBOutlet was in this code, but according to a Stack Overflow discussion, it is just a snippet that Xcode looks for when connecting the interface to your code. The IB stands for “Interface Builder”. There’s also @IBAction for working with methods.
If the above is a foreign language to you, brush up on the concepts of classes, objects, and methods in the modern language of your choice. Codecademy is a great free place to start!
For our purposes, @IBAction or @IBOutlet are just signals to Xcode that the variable being defined is connected to the UI.
Connecting the other Text Field to our code.
Now that we’ve connected our Label, the other piece of UI we need to connect is our Text Field where the user will type their name.
Again, ctrl-click and drag it to an empty spot in our view controller code. Again, we’ll get a popup but this time we have a few extra settings to set. In this case we want the connection to be an Action. That will create a function where we can define what happens when the user submits their name to our program.
We should name this function something descriptive like HelloWorldName, then set the type to UITextField. Finally, we want to set the Event to Editing Did End if it’s not already by default.
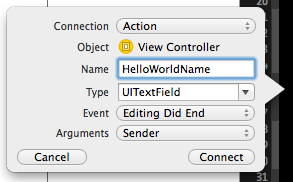
What we’ve just done is told Xcode that this UI element is going to perform some action when the user is done editing. After typing in their name and pressing “Enter”, some code we provide will execute.
This generates the code:
@IBAction func HelloWorldName(sender: UITextField) {}
Let’s rename the generically named variable sender to something more descriptive of what the user is actually giving us, like nameTextField. The resulting code would be:
@IBAction func HelloWorldName(nameTextField: UITextField) {}
4. Generating the “Hello, NAME!” result in our Label.
In between the curly braces of our new HelloWorldName function we can write any code we want the app to do when the user has submitted their name. While we could do something more elaborate like create a new view in our UI to show the result, let’s keep it simple. Let’s just change our Label (which currently says “Enter your name:”) to our new message.
In between the curly brackets, let’s change the value of our Label, which we had called nameLabel, remember? To do that, we can use this code, which I’ll explain afterwards.
@IBAction func HelloWorldName(nameTextField :UITextField) {
nameLabel.text = "Hello, \(nameTextField.text)" }
The new code is nameLabel.text = "Hello, \(nameTextField.text)" found between the curly brackets.
What we’ve done is set nameLabel to equal a string that says Hello, nameTextField. Note that to get a variable into our string, we had to use \(variableName.text).
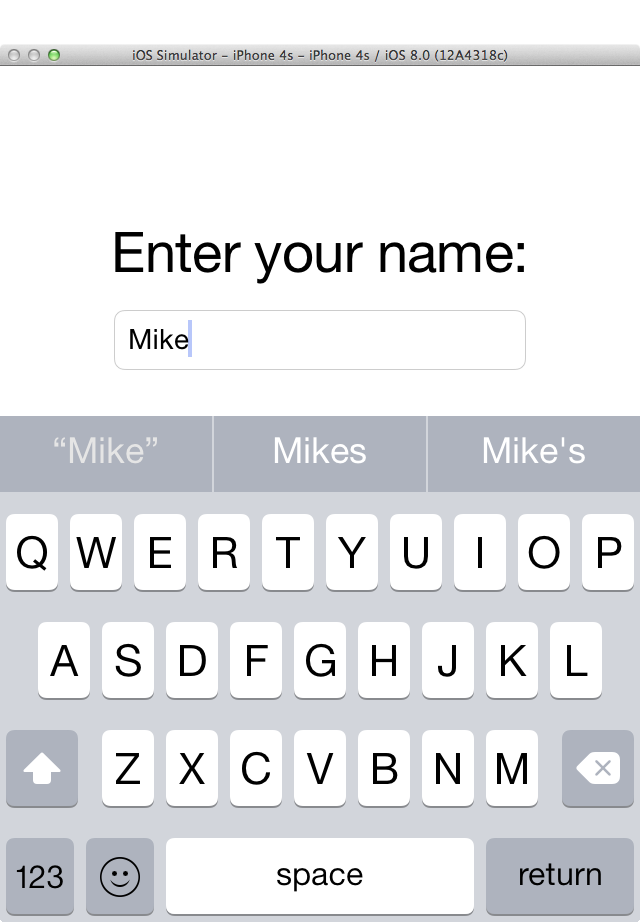
5. Build and run the app!
That’s all, folks! Here’s what the app looks like in action: